Resonance Assignment/CARA: Difference between revisions
mNo edit summary |
No edit summary |
||
| Line 92: | Line 92: | ||
#[[CARA Introduction|Introduction]] | #[[CARA Introduction|Introduction]] | ||
#[[Resonance Assignment/CARA/Starting a new project|Starting a new project]] | |||
#[[Spin System Identification with CARA|Spin System Identification in 2D 15N-HSQC and 3D HNNCO]] | #[[Spin System Identification with CARA|Spin System Identification in 2D 15N-HSQC and 3D HNNCO]] | ||
#[[Backbone Assignment with CARA|Backbone Resonance Assignment]] | #[[Backbone Assignment with CARA|Backbone Resonance Assignment]] | ||
Revision as of 01:42, 9 December 2009
Loading a new template
To start a new structure determination project in CARA you need to load a template. A template is a CARA repository without project that contains definitions for residue types, spectrum type and LUA scripts. You can either load the default template from the templates page of the official CARA web-site, or extract a template from an existing CARA repository.
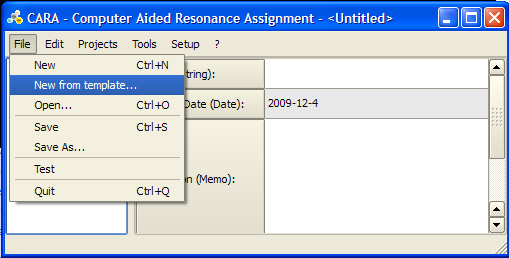
In CARA click File -> New from template and select the appropriate .cara file. For detailed instructions see [1]
CARA Template for GFT spectra BoR54_template.cara: Latest GFT template for BoR54 project
Starting a new project
Normally you would create a new project based on a protein sequence in XEASY format.
If you have the protein sequence in one-letter format you can convert it to XEASY .seq file the following way:
- Save the one-letter sequence in a .aa file, e.g. foo.aa
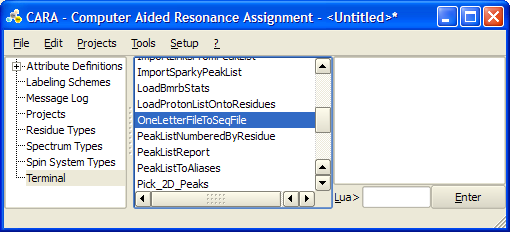
- Execute OneLetterFileToSeqFile LUA script from Terminal tab of the main window. Select your .aa file as input and give full path for the output .seq file.
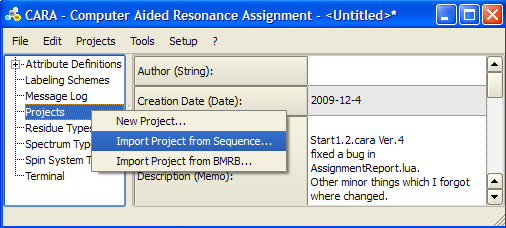
To create a new project for you protein in the repository right-lick Projects -> Import Project from Sequence.... Select the corresponding .seq file in the file explorer and click on the Residues button in the pop-up menu.
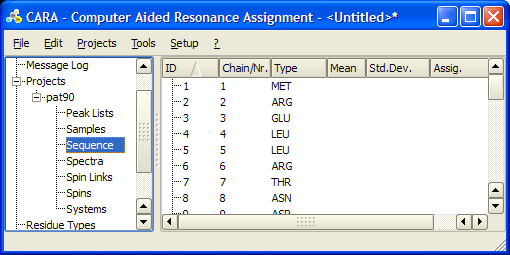
This will create a project entry with the same name as the *.seq file, with the sequence field appropriately filled and all other fields empty. The new project will have the same name as the provided .seq file, though it can be renamed.
Even though a repository can contain several projects, it is a good practice to have only one project per repository. For example, many LUA scripts assume that there is a single project in a repository.
You can also import a project from a BMRB file. In this case chemical shift data will be imported in addition to the sequence. For more details see [2]. Also check the page on importing XEASY files: [3]
Importing NMR spectra
The next step is to import NMR spectra into the project. Left-click on the Spectra node in the project, then right-click in the panel to the right. In the context menu move the mouse cursor to Add Spectrum and select the appropriate spectrum type, then chose the spectrum file in the file explorer. The following formats can be imported: XEASY (.3D.param), Sparky (.ucsf), BRUKER (.rr), NMRPipe (.ft) and Felix (.mat).
Most common spectra types are defined in the standard template. Please note that in the default template there are distinct spectrum type definitions for aliphatic and aromatic versions 2D [13C,1H] HSQC, 3D 13C-resolved NOESY, and HCCH spectra. You can also define additional spectrum types as described in http://www.cara.ethz.ch/Wiki/CreateSpectrumType.
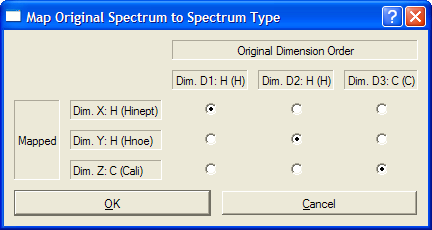
The order of spectral dimensions is normally irrelevant as CARA determines the correct mapping to the spectrum type from the type of nucleus associated each dimension. However, if the mapping is not unique (as in the case of 3D HBHA(CO)NH, 3D heteronuclear-resolved NOESY, 3D (H)CCH, 3D H(C)CH spectra, etc.), then a pop-up widow will prompt you to define the correct mapping.
For a given dimension CARA can "guess" the corresponding nucleus type from the ppm range of the dimension. This, however, may still be insufficient to distinguish between 15N and carbonyl 13C dimensions, or between methyl 13C and 1H. For XEASY spectra one solution to this problem is to make sure before importing that .3D.param include Identifier for dimension wX lines as in this example for a 3D HNCO spectrum:
Version ....................... 1
Number of dimensions .......... 3
16 or 8 bit file type ......... 16
Spectrometer frequency in w1 .. 60.7413
Spectrometer frequency in w2 .. 150.7300
Spectrometer frequency in w3 .. 599.4460
Spectral sweep width in w1 .... 27.6576
Spectral sweep width in w2 .... 15.9225
Spectral sweep width in w3 .... 8.3410
Maximum chemical shift in w1 .. 131.7220
Maximum chemical shift in w2 .. 185.6120
Maximum chemical shift in w3 .. 13.1120
Size of spectrum in w1 ........ 128
Size of spectrum in w2 ........ 256
Size of spectrum in w3 ........ 512
Submatrix size in w1 .......... 16
Submatrix size in w2 .......... 32
Submatrix size in w3 .......... 64
Permutation for w1 ............ 3
Permutation for w2 ............ 2
Permutation for w3 ............ 1
Folding in w1 ................. RSH
Folding in w2 ................. RSH
Folding in w3 ................. RSH
Type of spectrum .............. ?
Identifier for dimension w1 ... N
Identifier for dimension w2 ... C
Identifier for dimension w3 ... H
For more details see [4]
Referencing and aliasing in NMR spectra
There could be small systematic shifts even between properly transformed spectra. An easy way to correct these offsets interactively is described in the instructions for using SynchroScope [5]. Another possibility is to right-click on the spectrum of interest in the main window and select Calibrate Spectrum... from the context menu. You can explicitly enter the required corrections (in ppm) in in the pop-up window.
Please note that these are corrections for systematic shifts only - you cannot fix incorrect spectral widths within CARA. These calibration corrections are internal to CARA and the original XEASY .3D.param files remain unchanged. To properly use the same spectra and CARA assignments with an external program, such as ATNOSCANDID, you have to export the CARA calibration by right-clicking on the spectrum tab and selecting Write Calibration... from the context menu, which will update the corresponding .3D.param files.
In contrast to XEASY, peaks and spins in CARA are always shown at their true chemical shifts and lack folding attributes. To see folded peaks you have to scroll the spectrum beyond its default range in any given display scope (the View -> Show Folded checkbox must be selected to display folded regions, otherwise they will be black).
Folding attributes of spectral dimensions determine how "unfolded" regions are generated. CARA interprets the dimension folding attributes Folding in wX of .3D.param files upon importing, which have to be either RSH or TPPI. RSH stands for the most common wrap-around aliasing and TPPI means mirror-reflection folding. You can also change folding attributes after a spectrum is imported. Just expand the spectrum node to see the dimensions, right-click on a dimension tab and select Set Folding... from the context menu.
For additional details and examples see [6] .
